⭐️ In this tutorial we will learn how to create visuals by setting individual pixel colors~
 Color Typhoon by Trasevol_Dog (@URL)
Hello Dot
The pset( x, y, c) function takes in coordinates x & y and what color c the single pixel there should be set to.
For example we can set the middle most pixel to red:
function _init()
  -- clear screen to white (7)
  cls(7)

  -- set center pixel to red (8)
  pset(64,64,8)
end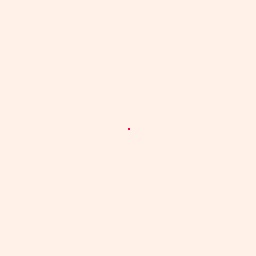
What if we go over every pixel in a line and set its color based on the x value.
Pico-8 only has colors 0-15 but if you pass a higher number it loops back. So 16 will be the color 0, 17 will be the color 1 and so on…
function _init()
  cls()

  for x=0,127 do
    c = x
    pset(x,64,c)
  end
end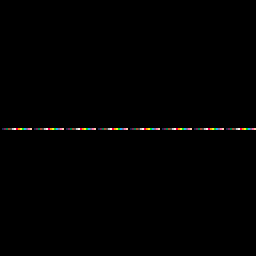
Hello Rainbow
Ok let’s do something more pretty!
If we divide x by 8 we will get 8px strips of each color.
Here is the math in a table if we loop over all the x values from 0 to 127 and set c=x/8
| x | c | color number | color |
|---|---|---|---|
| 0 | 1/8 | 0.12 ~ 0 | black |
| 1 | 2/8 | 0.25 ~ 0 | black |
| 2-7 | … | … ~ 0 | black |
| 8 | 8/8 | 1.00 ~ 1 | dark-blue |
| 9 | 9/8 | 1.12 ~ 1 | dark-blue |
| 9-126 | … | … | … |
| 127 | 127/8 | 15.87 ~ 15 | light-peach |
function _init()
  cls()

  for x=0,127 do
    for y=0,127 do
      -- divide x by 8
      -- to get 8px strips
      c = x / 8
      pset(x,y,c)
    end
  end
end
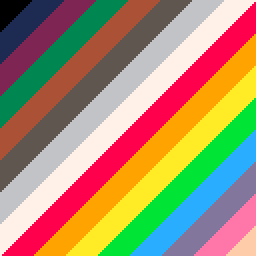
We can get a diagonal rainbow by adding y to the equation:
c = (x + y) / 16
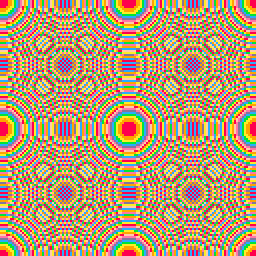
Exercise 🍓
You can get some interesting patterns by using x and y in different ways to set the color.
Try multiplying x by a value:
c = (3*x + y) / 16
or
c = (x*x + y*y) / 16
Dithering
A cool effect that’s used a lot is setting the color of a bunch of random pixels instead of all the pixels. For this effect, you don’t want to clear the screen so that the frames look like they’re blending.
For example if we take an equation similar to the previous section that changes over time and set random pixels instead of all the pixels it will look fuzzy:
function _draw()
  for i=0,4000 do
    x = rnd(128)
    y = rnd(128)
    c = (x/16+y/32+t())%6+8
    pset(x,y,c)
  end
end
We can also use this method to set random pixels to black instead of clearing the screen.
for i=0,1600 do
  x = rnd(128)
  y = rnd(128)
  pset(x,y,0)
end
If we take our spinning circle example from 4. Animating with Sin & Cos and do this, we can see the effect.
function _init()
  cls()
end

function _draw()
  -- clear screen by setting random pixels to black
  for i=0,1600 do
    x = rnd(128)
    y = rnd(128)
    pset(x,y,0)
  end

  -- spinning circle
  x=64+cos(t()/4)*40
  y=64+sin(t()/4)*40
  circfill(x,y,8,12)
end
What if we set the pixel to a random color between 0 and 2 instead of black?
pset(x,y,rnd(3))
Exercise 🍓
To get the dithering effect you need to have something moving on the screen. Start by creating an animated visual using sin or other methods and then add the dither clear code to get the dithering!
Try to play around with different colors too~
Burning
Another cool dithering is to take a pixel color and bump it down to another color. For example if we take this series of colors that eventually ends in black, we can get a cool fire effect!
function _init()
  cls()
end

function _draw()
  -- spinning circle
  x=64+sin(t())*30
  y=64+cos(t())*30
  circfill(x,y,4,10)

  -- burn effect
  for i=0,3000 do
    x=rnd(128)
    y=rnd(128)

    -- get pixel color and bump it down to the next value
    c=pget(x,y)
    if c == 10 then
      c = 9
    elseif c == 9 then
        c = 8
    elseif c == 8 then
        c = 4
    elseif c == 4 then
        c = 2
    elseif c == 2 then
        c = 0
    end

    circ(x,y,1,c)
  end
end
Exercise 🍓
You can achieve a lot of cool effects with burn and it’s a great way to get familiar with the palette. Try to create a natural plant growing effect by randomly setting some neighbor values and burning from lush down to nothing~
Next
⭐️ 6. Particles
Appendix
Resources